
Buying Ethereum with PayPal seems like a very convenient option especially if you face issues with banking restrictions in your country of residence. But using PayPal to buy Ethereum is not exactly a straightforward procedure, as the process requires many twists and turns.
Today’s tutorial shall present the least complicated way of purchasing Ethereum by using Paypal’s services.
Step 1: Buy Bitcoin with PayPal
The first thing you must do is to buy Bitcoins, as it has more flexible transactions at the moment.


LocalBitcoins and Paxful are good options for buying Bitcoin with PayPal. Both sites connect Bitcoin sellers and buyers and let them settle their trades offline without any third party interference. They also have similar fees and no standard rules. Furthermore, sellers on both platforms can decide to choose the payment method.
LocalBitcoins
LocalBitcoins is a peer-to-peer cryptocurrency exchange that has been among the first of its kind on the market, and because of this, it has a higher number of sellers. More sellers equate to lower prices for Bitcoin buyers.
Anyone is able to create a LocalBitcoins account, but just to be sure, check the site and what countries it supports.
Two features instated by the platform to protect buyers from scams are a rating system and escrow. Buyers can rate their sellers after each purchase, and the site also displays every seller’s transaction history on their profile. LocalBitcoins hold the Bitcoin in escrow until both parties have settled the details of the transaction.
Fees
A 1% fee is charged when posting an offer that appears in the search results. If you don’t create a new buy offer, there are no fees, but this means you have to search a little on the site for your desired trading price.
If you look through the PayPal-for-Bitcoin offers on LocalBitcoins, you will remark that the prices are quite high. That’s because PayPal comes with some risks for Bitcoin sellers. PayPal-for-Bitcoin sellers usually up their selling price to mitigate the risk that the buyer will make a chargeback on PayPal to get their money back after the sale has been finalized.
The Process
The search results page displays on the left a list of sellers. Next, to the sellers’ usernames, there is a number that features how many successful sales they’ve completed and another number that shows their reputation score.
To view all the available PayPal-for-Bitcoin offers, select a country and then choose PayPal from the drop-down menu. In the Terms of trade section, there is more information regarding the seller’s details for the transaction process.
Step 2: Trading Bitcoin for Ether
Now that you own some Bitcoin, the next thing you have to do is send your BTC into an exchange that supports Bitcoin-to-Ether exchanges. There are many exchanges that support that, but Coinbase Pro and Kraken are the two best options.
Coinbase Pro
Coinbase Pro is a cryptocurrency exchange that did not have to deal with any security issues so far. Though Coinbase Pro was designed to be used by advanced cryptocurrency traders, it’s not that difficult to master if all you want to do is trade Bitcoin for Ether.
Another advantage of Coinbase Pro is that users from US states, including New York, can access its services. Coinbase Pro received its New York’s Bitlicense in January of 2017.

Fees
Coinbase Pro features zero to 0.3% for digital currency trades, depending on the type of order you place (market, limit). Recurrent traders can benefit from fee discounts.
The Process
1. First start by creating an account on the platform and then have it verified by uploading your identification documents, in order to be able to make Bitcoin deposits. If you already have an account here, skip this step.
2. Click the deposit button. To find out which is your Bitcoin, click BTC Address. Your Bitcoin address will be displayed there.
3. Select and copy your Bitcoin.
4. Afterward, you will have to log back into which site you purchased your Bitcoin on and send your Bitcoin to Coinbase Pro.
5. In our LocalBitcoins example, click Wallet and then select Send Bitcoins.
6. Paste your Coinbase Pro Bitcoin address into the box which asks for Receiving bitcoin address, and also fill in the Next box in which you specify the amount you want to send.
7. Click Continue to complete the transfer.
After your Coinbase Pro wallet will receive your Bitcoin, you can then start trading your Bitcoin for Ether.
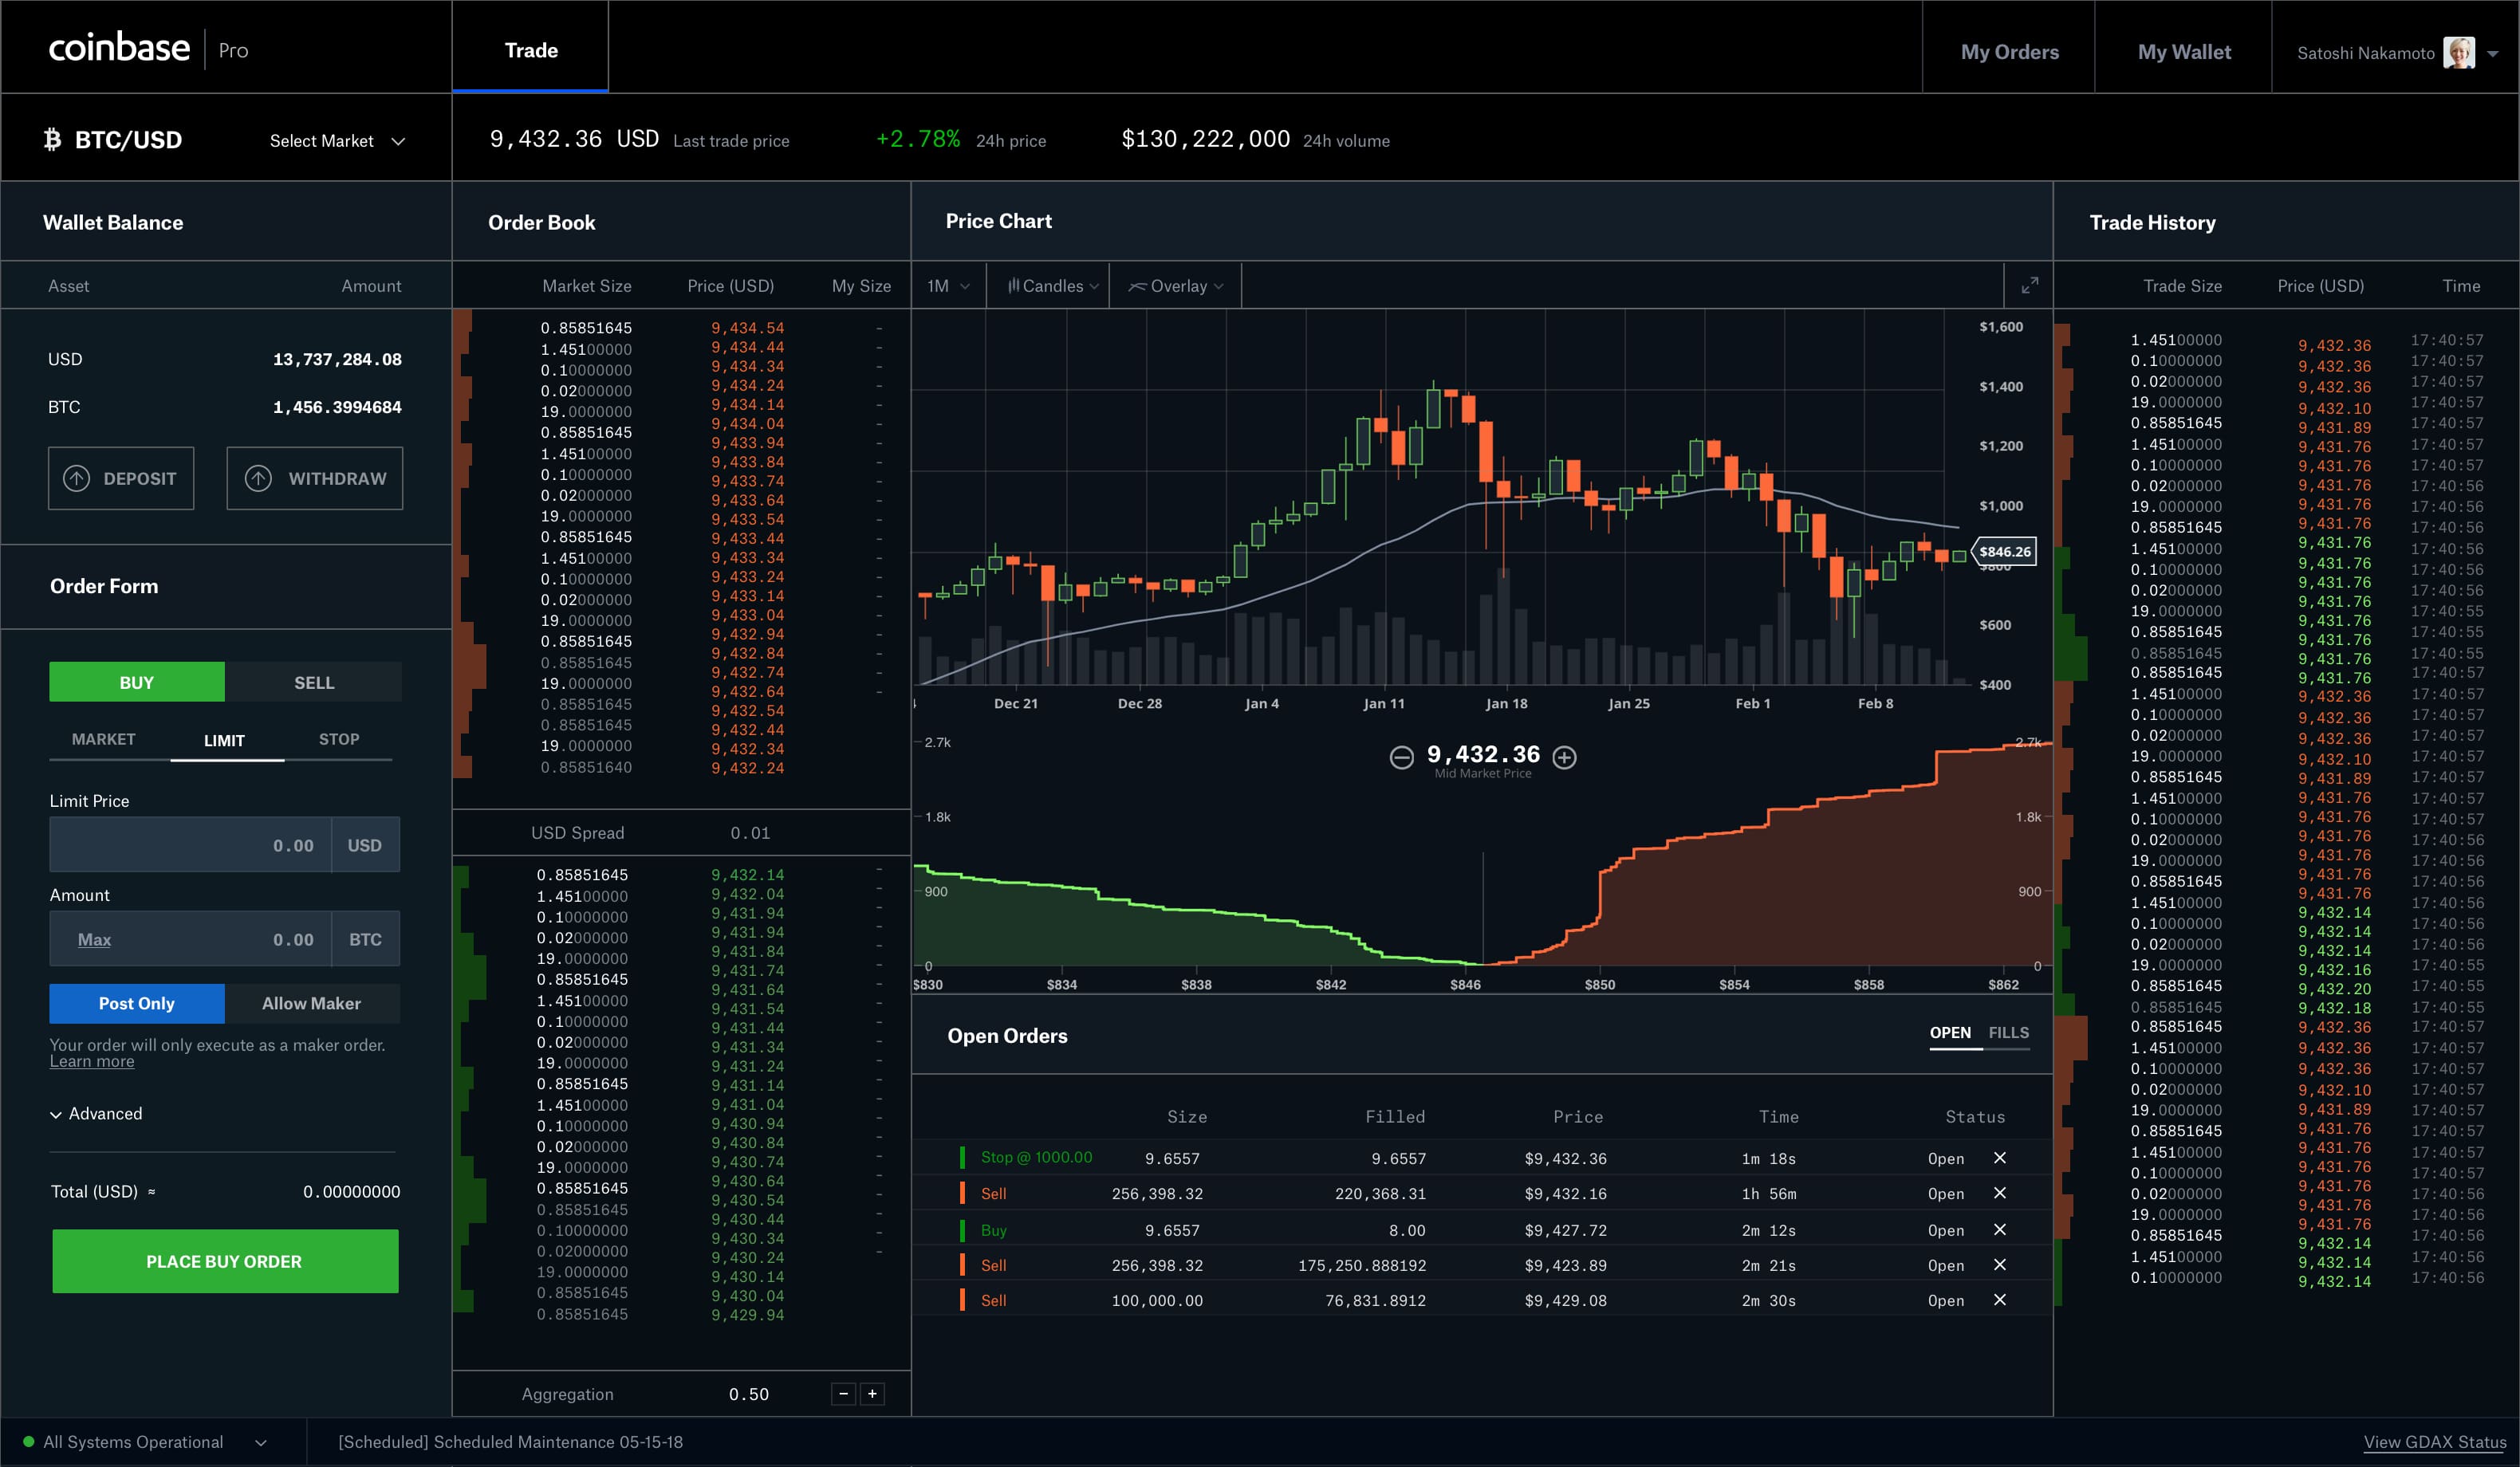
8. Go into Coinbase Pro, then open the Select product menu and select the ETH/BTC pair.
9. Enter the amount of Bitcoin that you wish to trade. The amount of Ether for that sum will be displayed above the green Place Buy Order button.
10. Click Place Buy Order and your Ether will be sent to your ETH wallet on Coinbase Pro.
Even though Coinbase Pro is a very secure exchange and is completely regulated, it is best not to leave your tokens in the exchange’s wallet. Transfer your ETH to an Ethereum-compatible wallet as soon as the trade is finished.
Conclusion
PayPal is not the cheapest method for purchasing Ether. As there is no option to buy Ether with PayPal directly, you have to first buy Bitcoin and then convert it into Ether on an exchange. This method is quite costly, as there are cheaper methods of purchasing ETH. But if you insist on using PayPal for personal reasons, you can follow this guide.